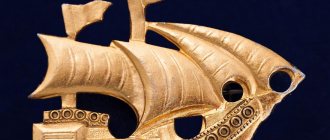
Master class: wedding ship made of candies
Are your friends getting married soon?! And you don't know what to give? Let's try to create a wedding ship with our own hands, made using the “sweet design” technique
A luxury ship as a gift for newlyweds! A great addition to the main gift! Such a gift will be remembered for a long time and will give a lot of joy and memories!
The master class is not easy, but you can master it. She described everything in detail, revealed many of her achievements that cannot be found in the public domain. Each master has his own methods and techniques - I want to share mine with you.
The master class is entirely based on my experience. There are a lot of subtleties and secrets so that everything is reliable, high quality and beautiful!
So, we will need:
1. Scissors, pencil, ruler, knife, paper, sandpaper (block).
2. Stirex (penoplex) 5 cm.
3. Glue gun and glue sticks.
4. Corrugated paper in scarlet, white, khaki and dark green. A little gold.
5. Gold and white braid, gold beads on a 6 mm thread. Gold cord 1-2mm.
6. Golden floral mesh.
7. Satin ribbons, red and white.
8. Round candies (“Martian”).
9. Three willow sticks (or something similar).
10. Toothpicks, skewers.
11. Various decor (gold beads, petals, artificial flowers).
12. Organza.
13.17 round sweets.
Part one. Preparation of the base of the ship.
Every time I draw a new template for the future ship. It is not difficult.
On the template, the bow of the ship is rounded . (In Paint, I can’t draw a straight curve with the mouse.)
1. We attach our template to Styrex and trace it. Then we cut it at a right angle. You can cut with an ordinary kitchen knife with serrations, but do not press, but cut as if with a saw.
2,3. We cut 1.5 cm diagonally from the top edge to the bottom (starting from the end of the ship, moving along the sides to the “nose”). We grind down the nose at the very end. We try not to cut off the main curve of the ship, but simply narrow the bottom.
4. Cut out the 2nd piece from Styrex. Rectangle 14 cm by 10 cm. And we make cuts diagonally along the 14 cm side.
1. It remains to make the last part for the bow of the ship. She is the most difficult. In principle, it is possible without it, but it will not be as beautiful as with this detail. If you have a thin Styrex 2.5-3 cm, then feel free to take it. I have 5 cm, I had to tinker a little.
2. And now we cut off the excess styrex from the nose of the part diagonally downwards. On the nose it is 20-25 mm, and in the wide, lower part it is 7 mm. This is how I did it (I cut in exactly this position, little by little removing the excess. You can draw a bevel line and use it as a guide.)
Important! My secret to even, smooth cuts. I sand everything with an emery block . It removes all nicks, bevels, and bulges. And brings the workpiece back to normal condition. I sand outside. The work is too dusty, it’s better not to sand the base at home (we only sand all the sides and irregularities).
3. After we have sanded all three parts, glue them together. To securely secure the back, make a hole with half a toothpick and glue it in. We put our back piece on it. Let's try it on. If all sides match, remove, apply a lot of glue with a hot glue gun, and quickly put on the part, press tightly and hold for 2-3 minutes so that everything sticks. We do the same with the bow part of the ship. We sand all the unevenness on the sides; if there are large gaps (more than 5 mm), we glue pieces of Stirex into them. We polish. And the base is ready. Now the fun begins.
4. We begin to cover the ship with corrugated paper from the upper deck. If you have a long piece of paper, there will only be 1 seam. I will have 2 seams. I apply the glue in strips, every 1.5-2 cm, and also along the very perimeter of the ship.
1.2. Cuts off everything unnecessary “at the root”. We don’t leave anything so it doesn’t stick out.
3 and 4. We glue the sides, you need a lot of glue. We cut off all the excess paper at the root.
Let's switch to making 8 roses and 9 buds (more is possible).
1. Cut pieces of paper measuring 3cm*6cm - 9 pcs. for 1 rose.
We also cut out a rectangle of 6 cm * 8 cm from paper. Round the edges. This will be the core of the rose.
2. Cut out according to the template (a regular droplet is 3 cm wide, about 5 cm high). We bend all the petals and the base under the core.
3. Using a toothpick, curl all the petals. We twist each petal from the left and right onto a toothpick. Giving it a lively look.
4. We fasten the tails of the candy with tape to the middle of the candy. Place the candy at a distance of 1.5-2 cm from the bottom and twist it, pulling the paper, into a bud.
1. We tie it tightly.
2. Using a toothpick, we twist the top, giving it a beautiful bud, bringing it closer to the real one.
3. Now let's start gluing the petals. There will be 1 row of three petals, and the second of 6 petals. Glue the first row in a circle. The height of the bud and petals is at the same level.
4. We glue the second row of overlaps onto the previous petal. And we tuck the last leaf inside the first (before the first, so that everything is the same).
1. Cut out the sepals for the base of the roses. Here's a trident. Height 1.5 spans by 7 cm wide (delimited by stripes on paper on a roll).
2. Cut off small cloves on each side of each clove. Afterwards we “bulge” the main teeth and curl the ends. We give a natural look.
3. Glue it around the rose so that the 3 main cloves stick out.
4. Let's prepare the parts for the buds. Light green khaki paper size 15 cm * 3 cm. Dark green paper 1 span by 7 cm wide. Candy with glued ends. Thread.
1. To make such a bud, twist it 1 turn in the center of light green paper.
2. Insert the candy and cover it with paper. Tie the tails of the bud tightly.
3. Cut out the sepal and glue it to the bud.
4. We got 9 buds of different colors. And also 4 red and 8 white roses.
1. Now let's move on to a very important moment. So to speak - the face of the ship "SAILS"!
I tried many options for how they are made. In the end, I came up with it myself so that it would be convenient to make and beautiful.
How to choose your own sails? The width at the bottom = the width of the ship is 14 cm, and at the top it narrows to 6-8 cm. I select the height by eye, I just look at the ship and the height itself is selected proportionally so that it is aesthetically pleasing.
I like to use Floral mesh “chain mail” - it holds its shape very well. You can take organza, but the sails may fall through.
2. I also draw a narrow sail, which is attached perpendicular to the main sails.
3,4. I cut ribbons and come up with a pattern. Once I did it with the English flag, there were not only straight stripes, but also diagonally.
My method for attaching ribbons to a sail. Most craftsmen glue with different types of glue. It's long and so painful. I realized very quickly that this was not my way. The glue often comes out, sticks unevenly, and gets distorted.
I sew the ribbons to the sail with a sewing machine. I quickly came up with this method. It's very convenient for me. It's also reliable. (Maybe someone else does this too, I’m unlikely to be the only one.)
1. Rule 1 of sewing ribbons. Adjusted machine. Especially if you sew on mesh. It goes easier on organza.
Rule 2. First sew on the edges of the sails. (Not the center! If you sew the center, it will be difficult to make both halves of the sail symmetrically. In addition, during the sewing process, the tape can move 2-5 mm. This occurs due to the pattern of the mesh itself.)
Rule 3. Do not make a knot either at the beginning or at the end. Can tighten the mesh with tape in a room. Also, if the thread pulls a little, you can straighten the seam by stretching it, then glue the ends.
Next we sew on the central red ribbon. It's very easy to hit the center and adjust the symmetry.
2.3. Sew white ribbons on each side of the red central one.
4. Glue the ends just a little. And we sew the top and bottom of the sail with red ribbon.
1 . Now we make the volume of the sail. As if they were blown by the wind. 2 sails will have 3 bulges, and one will have four. The central sail is higher than the others.
We retreat 14 cm from the bottom, fold the front side inward and stitch from the edge 5-7 mm. Here we fix the nodes. Then we glue them.
2. We retreat another 11 cm from 1 seam and stitch the row again. On a large sail we retreat 8 cm and also sew a line.
3. Oblique sail - first sew on the central stripes, then the edging. It's simple.
4. To put the sails on the masts, you need to make holes. We take an awl or a nail with pliers, heat it on a stove (I have a gas one), or on a candle, but it will take a long time. And we melt the holes. Important! Don't melt the thread that holds our sails inflated. There is a larger hole at the bottom and a smaller one at the top. The stick is narrowing. It needs to not dangle.
1. We prepare our sticks and masts for sails. The size with masts is clear. Visually select the height to make it beautiful. Don't forget to add 2-3 cm so that you can stick them into the base of the ship and set the sail. The other sticks will attach to the sails where we stitched and created volume in the sail. The size we take is the width of the sail at the seam +1.5 cm on each side. We sharpen the ends.
2. We wrap gold corrugated paper around all the sticks and masts (can be replaced with any color). We glue the beginning, middle and end.
3. We glue the finished sticks onto the seam of the sails, which is for volume (still the same). It can be on top, it can be on the bottom.
I glue everything except the top on top of each sail to hide the seam. And at the top - so that the beautiful red edging does not get lost.
4. We put sails on the masts.
Let's start decorating the base.
1. Cut the mesh to the size of the side. I immediately glue the braid on top. If you are uncomfortable, you can glue the mesh and then the braid. I start from the back of the ship, moving towards the bow, turn it and glue the tape along with the mesh on the other side.
2. Next we glue the L-shaped transitions at the stern of the ship. You can use the same braid. I chose a wider one with a different pattern, and even gold color. Also on both sides. Next, starting from the end of the ship, I glue the gold braid around the ship. All over the bottom.
3. Having reached the bow of the ship, I tape the edge of the bow, but not quite on top, leaving a gap of about 5 mm, there will be a stick there to extend the bow of the ship.
4. Next, I continue gluing the entire bottom of the ship with gold braid. On the reverse side too. I also add gold braid between the top and bottom rows. At the stern of the ship.
It's time to secure the sails so they don't dangle from side to side and don't slide down. Let's glue the shelves on the sails to the masts.
2. Prepare a 15-17 cm skewer, first wrap it in gold paper. Let's make a hole with an awl on the bow of the ship, where the gap was left. Let's drop a drop of glue into the hole and stick it into the bow of the ship 2 cm at an angle of 20-30* upwards.
We will also stick and glue the masts into the ship 2-3 cm deep. We set sails to make it beautiful. There are no specific rules. Whoever likes it.
3. Let's start pulling the ropes. At the bottom of the ship's bow we will glue a gold cord. I have a thin 1.2 mm. Next, we cut a stick through the extension of the bow of the ship, and glue a gold cord there.
4. We wrap all the tops of the sails in turn with gold lace to secure the sails. We glue the wrapped connections so that they are secure. (There is a photo below that clearly shows the general position of the cords.)
1. Next, we pull the golden cord to the rear, elevated deck. We tie and glue a knot, thread a needle with an eye and stick it into the corner of the ship, first squeeze out a dot of glue onto the corner. We insert the needle completely into the corner of the deck.
2,3. Since our lace ran out at the next corner, we take a new lace. Glue it to the rear mast and extend it to the other corner of the rear deck. We make a knot and stick a needle with it, as described earlier.
4. Glue a narrow sail to a golden cord from the bow of the ship to the first sail. Then we glue an additional lace for beauty and strength of the narrow sail.
1. Now let's work on the ladder for the masts. They are not very noticeable, but overall they complement well. Cut 3 strips 2 cm wide and the height of the mast.
2.3. Glue the sails on the top, then glue them at the bottom. Here you can clearly see how it sticks. Cover with white paper to keep everything neat. In principle, the sails are ready.
4. Let's move on to roses and buds. We need to give them legs. These could be toothpicks, wire, or wire. We straighten the “butt” of the rose or bud, drip glue and glue the stem. I have half a toothpick.
To fill empty space, I like to use triangles. They are done quickly and give volume. Of course, they are also very beautiful. After all, organza is used to make them.
1. Cut out a square 7*7cm approximately.
2. Bend any corner to the middle of the adjacent line.
3. In this case, we place the right corner on the left (fold it in half again). We get these 2 pyramids (hills).
4. Place a drop of glue between the two layers to prevent the pound from falling apart. You can glue in legs if you need to use them at a certain height.
1. Glue the pounds around the perimeter of the ship, running them forward a little.
2. Take roses and come up with a composition, stick them in the pattern and glue them.
3. Next, add nuts, filling the space, as well as pounds, especially in the center of the ship. To close the gaps.
4. We use additional decor: artificial flowers, beads, ribbons, blades of grass. We bring the composition to beauty (I inserted 3 more rattan balls and a little greenery).
Moves to the rear, elevated deck.
1. We poke holes around the perimeter and glue toothpicks. Where did I get 2/3 toothpicks? I cut off a third. It is very important to have sharp ends.
2. Because next we put 6 mm beads on the glue, with a hole on a stick. It turns out strong, nothing falls off.
3. We make a fence of beads on a thread. I have 3 mm. I usually take 1.5 mm. It looks just great! Glue it in such a way that the arcs between the posts sag. We glue the beads themselves on a thread to our sticks with beads.
4. We also glue it. More precisely, we glue 6 mm gold beads onto the sharp ends of the sticks that are on the sails. And we also glue a bead onto the bow of the ship on a gold stick.
1. Will work on the stern of the ship. I decided to glue this chain onto the needles with a loop. And I made hanging pendants around the edges that imitated lanterns.
2. I also made a window. With such a complex glass pattern. I also glued narrow strips of mesh at the very bottom, similar to headlights. 
3. I glued flags to the masts. I decided on simple ones. You can also sew ribbons and lace to them. And we glue a bead onto the tops themselves.
4. She hung an anchor on the front side of the ship and made a wavy chain. I complemented it with 6 mm gold beads.
1. I thought for a long time whether to make a window or not. All options were not suitable. And I glued 3 flowers (metal caps for beads).
2,3. I went through the bottom of the ship with a gold cord, making such a pattern. It can be anything for you. This time I don’t want many, many filled sides. Everything is so elegant and subtle. It's a wedding ship!
4. All that's left to do is the steering wheel! Cut a 5 cm circle from Styrex, 1.5 cm thick.
1. Seal it on all sides with gold corrugated paper. First the front, the back, then the side in a circle.
2. We edge it with braid, with an allowance on the central sides. I make a hole for the stick-trunk.
3. We stick 7 more sticks under the glue, first in the form of a cross (+) then in the form of an X (X). We insert the stick, having previously wrapped it with gold corrugation.
4. Place 6 mm beads on glue and place the steering wheel on the rear deck.
We stick the steering wheel. You can put a figurine of the newlyweds there (alas, it’s not sold in my village).
We also stretch the ropes from each mast, wrapping each stick of the sail. We fix it at the base with a needle with an eye. We hide it under a pound with organza.
Our luxuriously delicate ship is ready!
Thank you very much for reading to the end!
If you liked the master class, support it by clicking the “LIKE” button!
Thank you!
Your Ugne Tsverkunova!
P/S: I don’t mind if you use my master class on other Internet resources. The master class is the author's, please put a link to this page. We also save a watermark with the store address.
Sailboat as a talisman of wealth according to Feng Shui
A ship with multiple sails and masts is considered one of the oldest talismans in the history of Feng Shui. It was first used as a symbol of wealth in the 8th century, because it was then that many merchants and traders were engaged in transporting expensive goods from other countries. People have always associated the arrival of a sailing ship loaded with numerous treasures with wealth and money, and therefore, over time, the heads of shipping companies, as well as other traders and merchants, began to use figurines of boats as a talisman, bringing good luck in business and quick enrichment. Thus, another symbol has appeared in Feng Shui, bringing material wealth and prosperity to its owners.
Cool congratulations on the wedding with the presentation of money
Previously, it was customary to present newlyweds with services, but now the most popular gift is banknotes. Some people don’t like to give banknotes as gifts due to the lack of effect and because they are trivial. Cool congratulations on a wedding with the presentation of money will change the way you look at this type of gift. Original ways of serving will pleasantly surprise you, the newlyweds and your guests. Your congratulatory speech will definitely end up in the photo and video archive.
In the article you will find the best options for accompanying words (in prose, in verse). As well as ideas for presenting the funds themselves. You can give money in the usual way - in an envelope. And a cool congratulation will add effect to the presentation. Or present the banknotes in an unusual form (see the article), saying a couple of touching/funny wishes. Or combine an original presentation with a cool congratulatory speech.
Surprisingly, even a small amount can be given effectively. To do this, change large bills. The more banknotes you get, the better.
Get ready to do some handicrafts and learn lines of wishes. Long quatrains, of course, can be read from a piece of paper. Better yet, write down the necessary words on a beautiful postcard.
Why won't the ship set sail?
I have no goal of sailing the ocean on the “Lord of the Seas”: it is impossible to register such a large ship in Russia.
My “Lord of the Seas” is a great location for romantic photo shoots
Initially I wanted to put the ship on the water near the shore and make something like an entertainment complex. But I changed my mind: there are enough restaurants and entertainment on the coast. And the builders also “helped” by disrupting the technological process.
Features of the talisman
In addition to sails and masts, Feng Shui experts also recommend paying attention to the color and design of the ship. The strongest and most “correct” sailboat is considered to be the one made of wood or metal painted gold. Moreover, for greater efficiency, Chinese coins and other symbols of wealth can be placed on board.
It is very important that the sailboat stands firmly on some kind of stand or shelf. If you don’t have one, you can put a red napkin under it with hieroglyphs symbolizing material wealth and financial well-being.
Finally, I would also like to note that one of the most expensive and prestigious options for a ship of wealth according to Feng Shui is a ship made in the shape of a dragon. As a rule, it is gold in color (and sometimes actually made of gold) and is completely devoid of sails. The main driving force behind such a rare talisman is the dragon itself, which personifies not only financial well-being, but also the high social status of its owner. Such ships can rarely be seen for sale, because they are given on special occasions only to oligarchs or millionaires.
Share
What's next
People are interested in how the construction is going and what help is needed, I often organize live broadcasts on VKontakte and Instagram and answer questions.
But I don’t favor volunteers. Many of those who apply for a construction job reason like this: they say, let’s go to Crimea, live for free, build a ship, have a good rest. I don't expect such cunning people.
This is what a cultural and tourist complex in the style of a pirate village will look like
The plans are to build a year-round cultural and tourist complex in the style of a 17th-century pirate village. There will be creative workshops, entertainers, live shows and a tavern. Well, actually the main character is “Lord of the Seas”. So the story of my large-scale project is just unfolding.
Text: Inna Kireeva Photo: personal archive of Victor Scaletto
How to use a sailboat in practice?
Today, in souvenir and esoteric goods stores you can see a huge variety of boats, boats and ships, but not all of them can be confidently called an eastern symbol of wealth. These do not include warships and other vessels that have guns or any other weapons on board.
According to history, only the ship that has many different masts and sails brings money with it, and the latter should not be lowered, but inflated, as if the wind were blowing through them.
Short congratulations in verse on the presentation of money
Brief and clear is the motto of the following congratulations. Read, choose and remember.
Happy wedding day, Here's to the estate.
Let your gift be joyful and fulfill your most cherished desires. Let every day be bright, And let the mood be sweet.
Husband, wife, don't be discouraged! After all, today is an important day. Get your money quickly, spend it on whatever you are lazy about.
Today I will be a fairy without any adventures. Just fulfill all your desires yourself, with the help of banknotes. And don't thank me for your efforts.
We hand over a cash envelope. Let your budget not suffer.
Accept a modest gift, May it be for good. No, not a Mercedes, not a samovar, but securities.
So that you have money, And you love each other.
Happiness is not in money, only in miracles. In order to keep the course for happiness, this resource will be required
Maneki-neko - happy cat
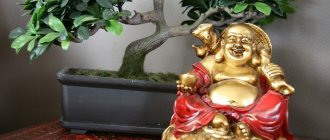
This beautiful decoration is not only quite cute, but also extremely useful as it will bring happiness and prosperity to its owner. This is especially true for people working in business, because a cat will help increase sales several times. The statuette will also be useful for ordinary workers, as it guarantees rapid advancement up the career ladder. It is best to place Maneki-neko at the entrance to an office or store. At home, the cat can be kept near the bed so that it gives its owner a positive attitude every morning.
Cool congratulations to the newlyweds on their wedding with the presentation of money
Do you need funny congratulations for a wedding with the presentation of money with jokes? Let's look at some ideas for serving. You will find options for the accompanying speech in the following paragraphs. Top 10 original ways to give money to newlyweds:
1. A collage of money of different currencies or different denominations. An assortment of currencies is suitable for couples who love to travel. You can place a picture of banknotes in a large format photo frame.
2. Big surprise gift . A large box is prepared in advance and filled with unnecessary cans. Wrap the container with wrapping paper and a bow. It is taken out into the hall to the newlyweds with the appearance that the box is heavier than it really is. The donor then accidentally trips and drops the box. Judging by the sound of jars clinking, the young people are afraid that the gift has broken. After which, with a calming gesture, an envelope with money is taken out of the box with the words that these are instructions for the gift.
3. Composition using money . A tree with branches is drawn, printed or embroidered. Each branch is accompanied by a bundle of money. It turns out to be a money tree. Inscriptions are made next to each bill. For example, for a car, for a vacation, etc.
4. Money umbrella. Banknotes are attached to the inside of the umbrella on threads in advance. The young people are given a closed umbrella. After congratulatory words, the donors ask the couple to open the umbrella. This is where they are surprised to see such a money umbrella above them. An accompanying speech related to the weather in the house is suitable here.
5. Surprise box . A bunch of helium balloons is hidden in a beautiful large box. The container is wrapped in a bow. The young people unfold the box and the balls fly out (not to the ceiling, the base remains in the box with the help of a holding weight). Each ball has a bundle of money attached to it.